
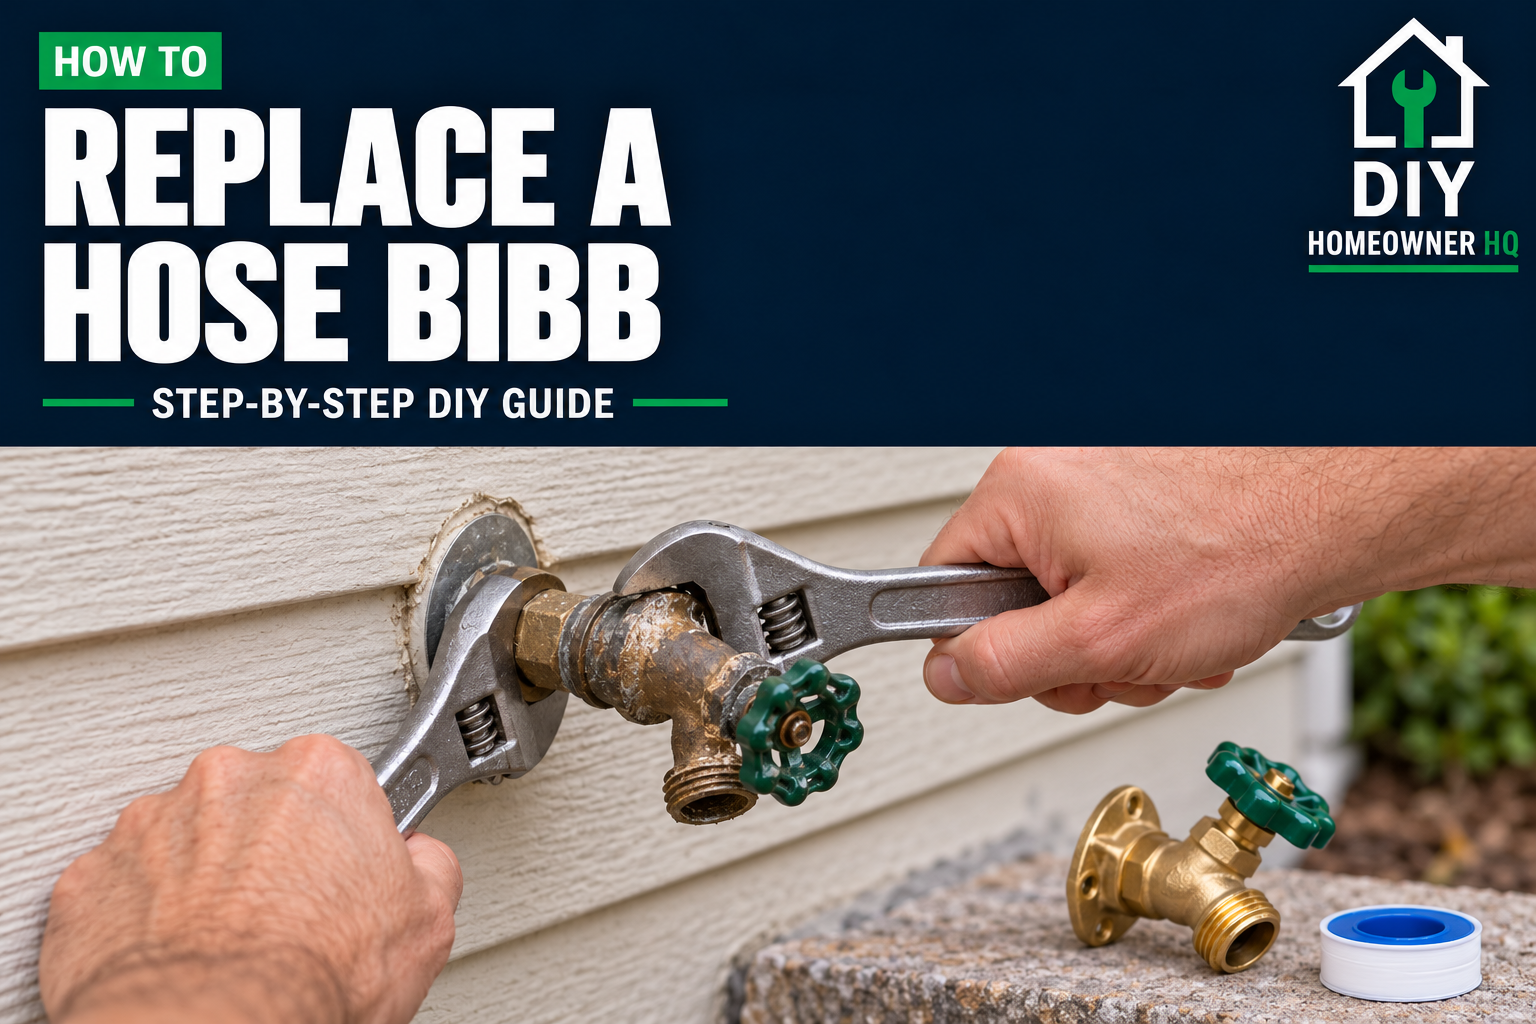
Safety First
Shut off the home’s main water supply and open the hose bibb to relieve pressure before disconnecting it. Confirm that water has stopped flowing completely. Use a second wrench to support the supply fitting so you do not twist or break the pipe inside the wall. If the hose bibb is soldered, connected to brittle or heavily corroded piping, or cannot be accessed from inside the house, stop and contact a plumber. Never use a torch near siding, insulation, or other combustible materials unless you are trained to do so.
Time
30-90 Minutes
Difficulty
Moderate
Cost
$15-$50
🧰 Tools & Materials
Tools
- Two adjustable wrenches
- Tongue-and-groove pliers
- Phillips or flathead screwdriver
- Utility knife
- Wire brush
- Flashlight
- Bucket
- Towels or rags
Materials
- Replacement hose bibb matching the existing connection
- Plumber’s tape for threaded connections
- Pipe-thread sealant approved for potable-water lines, if recommended
- Exterior-grade silicone sealant
- Replacement mounting screws
- Replacement vacuum breaker, if needed
Optional but helpful:
- Penetrating oil
- Drill and appropriate drill bits
- Replacement interior shutoff valve
- Foam or escutcheon plate for sealing the wall opening
Signs It’s Time to Replace a Hose Bibb
A hose bibb may last for many years, but its internal seals and exterior components can eventually wear out.
Consider replacing it if:
- Water drips from the spout after the handle is closed
- Water leaks around the handle or valve stem
- The handle is broken, loose, or difficult to turn
- The hose connection is cracked or badly corroded
- The bibb was damaged by freezing
- Water leaks inside the wall when the faucet is used
- The faucet no longer provides adequate water flow
- A repair washer or packing adjustment did not stop the leak
- You want to upgrade to a frost-free hose bibb
A small drip from the spout may only require a new washer. However, replacement is usually more practical when the body is cracked, the threads are damaged, or several parts are badly corroded.
Before You Buy
Hose bibbs are available in several sizes, connection types, and lengths. Examine both the outdoor faucet and its connection inside the house before buying a replacement.
Common connection types include:
- Threaded connections
- Soldered copper connections
- PEX connections
- CPVC connections
- Push-to-connect fittings
- Frost-free hose bibbs with long bodies extending through the wall
Threaded hose bibbs are generally the simplest to replace because the old faucet can be unscrewed while the supply fitting is supported with a second wrench.
A frost-free hose bibb may look similar from outside, but its actual water connection is several inches inside the house. Replacement models must match the wall thickness and connection length.
Common inlet connection types include:
- Threaded connections
- Soldered copper connections
- PEX connections
- CPVC connections
- Push-to-connect fittings
You may have either a standard hose bibb or a frost-free model with a long body that extends through the exterior wall.
💡 Pro Tip: Take clear photos of the exterior faucet and its interior connection before shopping. If possible, measure the existing hose bibb from the mounting flange to the end of its inlet connection.
Before You Start
Locate the pipe supplying the hose bibb from inside the basement, crawlspace, garage, or utility area.
You need to know whether the bibb is threaded, soldered, or connected with another fitting before attempting to turn it from outside. Twisting a soldered hose bibb can damage the pipe inside the wall.
Turn off the nearest working interior shutoff valve if the hose bibb has one. Otherwise, follow How to Shut Off the Water to Your House before beginning.
Open the hose bibb and allow the remaining water and pressure to drain. Keep the faucet open until water stops flowing.
Remove the garden hose before beginning. Leaving a hose attached can make the faucet harder to handle and may prevent a frost-free bibb from draining properly.
💡 Pro Tip: Have the replacement hose bibb ready before removing the old one. You do not want to leave the water supply off while searching for a matching part.
Step 1: Inspect the Interior Connection
Find the pipe directly behind the hose bibb or follow the supply line to the exterior wall.
Look for the point where the hose bibb connects to the home’s plumbing.
A threaded connection usually has visible wrench flats, a threaded adapter, or a fitting that can be held with a second wrench.
A soldered connection will normally appear smooth, with solder visible around the joint. PEX and CPVC installations may use crimp rings, clamps, adapters, or glued fittings.
What You Should See: You should be able to identify the hose bibb connection and determine how to prevent the supply pipe from twisting.
If Yours Looks Different: If the connection is hidden inside a finished wall or cannot be reached, do not attempt to twist the faucet from outside. Access may need to be created before the hose bibb can be replaced safely.
Step 2: Shut Off and Drain the Water
Close the local shutoff valve serving the hose bibb. If there is no local valve, shut off the home’s main water supply.
Open the outdoor faucet completely.
Wait until water stops flowing, then place a bucket or towel beneath the interior connection. Water remaining inside the pipe may drain when the faucet is disconnected.
Check another nearby fixture to confirm that the water supply is controlled before loosening any plumbing connection.
What You Should See: Water should stop flowing from the open hose bibb after the remaining pressure drains.
If Yours Looks Different: If water continues flowing at normal pressure, the shutoff valve may not be fully closed or may have failed internally. Do not disconnect the hose bibb until the water is completely controlled.
Step 3: Remove the Mounting Screws and Sealant
Look for screws securing the hose bibb’s flange to the exterior wall.
Remove the screws with the appropriate screwdriver or drill bit. Set them aside if they remain in good condition.
Use a utility knife to carefully cut through silicone or caulk around the mounting flange. Avoid cutting into the siding or weather-resistant barrier behind it.
Do not pull the faucet away from the wall yet. The plumbing connection must be released first.
What You Should See: The mounting flange should be free from the wall, but the hose bibb should remain connected to the supply pipe.
If Yours Looks Different: Some older hose bibbs are not fastened to the wall. In that case, the plumbing connection may be the only thing holding the faucet in place.
Step 4: Disconnect the Old Hose Bibb
For a threaded connection, place one wrench on the supply adapter or fitting inside the house. This wrench prevents the pipe from turning.
Place the second wrench on the hose bibb or its wrench flats. Turn the hose bibb counterclockwise while holding the supply fitting completely still.
If the fitting is corroded, apply penetrating oil to the exterior of the threaded connection and give it time to work. Do not allow oil to enter the open water line.
For a frost-free hose bibb, disconnect the inlet connection from inside the house before pulling the long faucet body through the wall.
Do not twist a soldered, glued, crimped, or clamped connection. Those installations require the appropriate cutting and reconnection method.
What You Should See: The old hose bibb should separate from the supply fitting without the pipe behind the wall twisting or moving.
If Yours Looks Different: Stop immediately if the pipe rotates, bends, or moves inside the wall. Continuing could break a hidden fitting and cause a leak after the water is restored.
💡 Pro Tip: Take a picture of the old connection before removing it completely. This gives you a reference for the replacement’s orientation and installation depth.
Step 5: Inspect and Prepare the Connection
Inspect the exposed pipe and fitting for:
- Cracked or damaged threads
- Heavy corrosion
- Mineral buildup
- Distortion
- Signs that the pipe moved inside the wall
- Old thread tape or sealant
- Moisture around nearby joints
Remove old plumber’s tape and loose thread sealant with a wire brush or cloth. Avoid damaging the threads.
Compare the new hose bibb with the old one. Confirm that the inlet size, thread type, body length, and mounting flange match.
For a threaded connection, wrap plumber’s tape around the male threads in the same direction the hose bibb will tighten. Keep the first thread mostly clear so tape does not tear off inside the plumbing.
Apply potable-water-rated thread sealant if it is recommended by the hose bibb manufacturer.
What You Should See: The supply fitting should be clean, undamaged, and ready for the replacement connection.
If Yours Looks Different: Do not install the new hose bibb onto cracked, flattened, severely corroded, or partially stripped threads. The damaged fitting should be repaired first.
Step 6: Install the New Hose Bibb
Start the threaded hose bibb by hand. It should turn several times without binding.
If it becomes difficult to turn immediately, remove it and check the threads. Do not use a wrench to force a cross-threaded connection.
Once the faucet is hand-tight, hold the supply fitting with one wrench and tighten the hose bibb with the second. Position the faucet upright with the outlet facing downward.
Avoid overtightening. Excessive force can crack the fitting, damage the threads, or twist the supply pipe.
For a frost-free hose bibb, follow the manufacturer’s mounting instructions. Most frost-free models must slope slightly downward toward the exterior so water can drain from the body when the faucet is closed.
What You Should See: The new hose bibb should sit firmly against the wall, remain upright, and have a secure plumbing connection.
If Yours Looks Different: If the faucet becomes tight while facing the wrong direction, do not loosen it simply to improve its position. The threaded connection may need to be removed and resealed or adjusted with a compatible fitting.
Step 7: Secure and Seal the Hose Bibb
Fasten the mounting flange to the wall with corrosion-resistant screws appropriate for the siding, masonry, or exterior surface.
Do not rely on the pipe itself to support the faucet. The flange should hold the hose bibb firmly when a hose is attached or removed.
Apply exterior-grade silicone around the wall penetration and behind or around the mounting flange as appropriate. Seal the opening against rain, insects, and drafts without covering any drainage opening provided by the manufacturer.
For frost-free models, verify that the faucet still slopes slightly toward the exterior after it is secured.
What You Should See: The flange should sit securely against the wall without wobbling, and the wall opening should be protected from moisture.
If Yours Looks Different: If the wall surface is damaged or cannot hold the mounting screws, repair or reinforce the mounting area before using the faucet.
Step 8: Restore the Water and Test for Leaks
Make sure the new hose bibb is closed.
Slowly reopen the local shutoff valve or the home’s main water valve. Restoring water slowly reduces sudden pressure changes in the plumbing.
Inspect the interior connection immediately as pressure returns. Use a dry paper towel around the joint to reveal small leaks.
Open the hose bibb and let water run for 30–60 seconds. Check the water flow and inspect the connection again while water is moving.
Close the faucet and watch the spout, valve stem, wall penetration, and interior connection for several minutes.
What You Should See: The hose bibb should provide steady water flow, shut off completely, and remain dry at every connection.
If Yours Looks Different: If a threaded connection drips, shut the water off and relieve pressure before making adjustments. Do not tighten or disassemble a leaking connection while it remains pressurized.
💡 Pro Tip: Check the interior connection again later that day. A slow leak may not become visible immediately after the water is restored.
If Something Goes Wrong
Problem: The old hose bibb will not turn.
Solution: Confirm that it uses a threaded connection. Cut away any remaining exterior sealant and apply penetrating oil to the outside of the threads. Use two wrenches, keeping the supply fitting completely stationary. Stop if the pipe begins moving.
Problem: The supply pipe twists inside the wall.
Solution: Stop turning the hose bibb immediately. The fitting needs to be stabilized or repaired before removal continues. Twisting can weaken or break a hidden connection.
Problem: The new hose bibb becomes tight while facing sideways.
Solution: Do not leave the faucet in the wrong position or loosen it to align it. Remove it, inspect the threads, reapply the correct sealant, and reinstall it. A different fitting may be required if proper alignment cannot be achieved securely.
Problem: Water leaks from the threaded connection.
Solution: Shut off the water and relieve pressure. Remove the hose bibb, clean the threads, inspect for damage, and reapply plumber’s tape or approved thread sealant according to the manufacturer’s instructions.
Problem: Water leaks around the handle.
Solution: Verify whether the leak is coming from the packing area, valve stem, or body. A small packing adjustment may be possible on some models, but a defective new hose bibb should be replaced rather than overtightened.
Problem: Water appears inside the wall or house.
Solution: Shut off the water immediately. The connection may be loose, cracked, or damaged. Do not continue testing until the interior joint has been inspected and repaired.
Problem: A frost-free hose bibb drips after being closed.
Solution: A brief drain-down can be normal because water remaining in the long faucet body must escape. Continuous dripping may indicate a defective seal or improper installation. Remove any attached hose and confirm that the faucet slopes toward the exterior.
🛑 Common Mistakes to Avoid
- Buying a replacement before identifying the connection type
- Turning the hose bibb without supporting the supply fitting
- Attempting to unscrew a soldered or glued connection
- Failing to shut off and drain the water completely
- Using plumber’s tape on connections that do not require it
- Cross-threading the replacement hose bibb
- Overtightening the threaded connection
- Leaving the faucet unsupported by mounting screws
- Installing a frost-free hose bibb without an outward slope
- Leaving a garden hose attached during freezing weather
- Covering a drainage opening with sealant
- Restoring water too quickly
- Checking only the exterior and ignoring the connection inside the house
❓ FAQs
Can I replace a hose bibb myself?
Yes, if the connection is threaded, accessible, and in good condition. Soldered, glued, concealed, or badly corroded connections may require a plumber.
Do I need to shut off water to the entire house?
Not if the hose bibb has a working interior shutoff valve. Otherwise, you will usually need to shut off the home’s main water supply before removing the faucet.
Why do I need two wrenches?
One wrench turns the hose bibb while the other holds the supply fitting stationary. This prevents the pipe or a hidden connection from twisting inside the wall. The same support principle is important when following How to Replace a Toilet Shut-Off Valve.
Should I use plumber’s tape on a hose bibb?
Use plumber’s tape on compatible tapered threaded connections when recommended. Do not use it on soldered, glued, compression, or manufacturer-sealed connections that rely on another sealing method.
What is the difference between a hose bibb and a frost-free hose bibb?
A standard hose bibb shuts off near the exterior handle. A frost-free model has a long body that places the shutoff point inside the heated portion of the house, reducing the chance of freezing when it is installed and drained correctly.
Why does my frost-free hose bibb leak only when the water is running?
The long interior tube may have split after freezing, often because a hose was left attached. Water can leak inside the wall when the faucet is opened even though it appears dry when closed. Replace the damaged hose bibb before using it again.
Does a new hose bibb need a vacuum breaker?
Local plumbing codes may require an anti-siphon vacuum breaker to prevent contaminated water from being pulled backward into the potable-water system. Many new hose bibbs include one. Check your local requirements and the manufacturer’s instructions.
📞 When to Call a Professional
Call a licensed plumber if:
- You cannot identify the connection type
- The hose bibb is soldered directly to copper pipe
- The connection is concealed inside a finished wall
- The supply pipe twists, bends, or moves during removal
- The pipe or fitting is badly corroded
- The threaded fitting is cracked or stripped
- Water continues flowing after the shutoff valve is closed
- A frost-free hose bibb has leaked inside the wall
- The replacement requires cutting or modifying PEX, CPVC, or copper pipe
- The new connection continues leaking after proper installation
- You cannot securely fasten the hose bibb to the wall
A hose bibb connection can leak inside the wall where damage is not immediately visible. If you cannot inspect and test the connection confidently, professional replacement is the safer option.